Anchor-free pull and hinge ladders for small apartment strength

Based in Western Europe, I'm a tech enthusiast with a track record of successfully leading digital projects for both local and global companies.
The air smells like coffee that sat a bit too long on the counter, and my watch gives that small beep that says “ok, we do it or we don’t.” After a workday in Lisbon, there’s often this micro-pause where I scan the room and my own battery level. Low energy. Floor not perfectly clear. And my brain wants a fast win, something with zero setup.
Push-ups and squats survive that moment. They start in seconds. No equipment. No “where do I attach this thing.”
But when that default repeats for weeks, pulling and hinging are the first to disappear. And that’s how training can still feel “done” while the body slowly becomes more desk-shaped. Neck, shoulders, upper back. In my case, these zones complain the loudest in remote life. And when those complaints stick around, strengthening around the shoulder blades and upper back is often part of the bigger plan. Not a magic fix. Just a common ingredient.
So I started building a plan that removes the friction that makes pull and hinge vanish, without asking my tired brain to solve a rigging problem.
- No door anchor required
- No pull-up bar required
- No trusting a random chair with your bodyweight when you’re tired
- Progress you can measure, like you would with push-ups
You’ll get two practical ladders that fit real apartments and real schedules.
- An anchor-free pull ladder, from towel isometrics to chest-supported backpack rows
- A quiet hinge ladder, built around backpack RDLs, hamstring sliders, and hinge holds
- Simple rules that keep it safe and repeatable, with one metric and one form gate so the numbers stay honest
- A small-space weekly template that prevents the classic drift back into push-plus-legs only
It’s not about perfect ratios or building a spreadsheet empire. It’s about keeping the patterns that counter screen life, even on the evenings when motivation is not gone. It’s just stuck behind setup friction.
When pulling disappears first
Why push and squat survive
At the end of the workday, the decision window is tiny. Setup burden plus interruption risk can look like “motivation problems” when you’re tired.
Push-ups and squats don’t ask questions. You don’t have to attach anything. You don’t have to test whether a door or chair is secretly sketchy. You just start.
Pulling and hinging are different. They often come with a little tax: finding an anchor, clearing space, making sure the setup won’t slip, adjusting angles. And that tax is exactly what my brain tries to avoid when it’s low-battery.
Pull and hinge as the desk antidote
Two patterns act like a counterweight to screen life.
- Pulling trains shoulder blade control and upper-back endurance (the “don’t live in a shrug” skill)
- Hinging trains the backside in a way squats don’t, plus trunk extensor endurance for boring real-life lifting
No perfect push-pull ratio needed. Real rooms are not spreadsheets.
The real constraint is practical. You can’t assume a door anchor, a bar, or a chair that won’t shift. Many objects look stable until you’re tired and the force angle gets weird.
So the goal here is simple.
- No door anchor required
- No pull-up bar required
- No furniture trust required
- Measurable progression like a push-up progression
Anchor-free rules that keep pulling consistent
No anchors and no furniture trust
Even when a chair is right there, you still need to decide what you can truly trust with bodyweight when fatigue arrives.
Rule 1. If a movement needs a door anchor or pull-up bar, it can be a bonus later, but not the base plan. Doors vary. Trim varies. “Looks solid” is not a criterion.
Rule 2. Furniture is not designed for dynamic exercise loading. It can tip or slide. Safety is part of consistency because one stupid slip can delete weeks of momentum, and also your mood for training.
If an object must be used, keep it boring.
- No wobble when you push it at the contact point
- It does not slide when you shove it sideways
- Wide and low base, not tall and tippy
- Hard flat contact, no cushions, no narrow edges
- If in doubt, pin it to a wall or corner
- Keep reps slow, no explosive transitions
Progress that stays measurable when you are tired
To keep this as strength training and not random substitutions, every move needs two things.
Rule 3. A metric and a quality gate.
- Metric: reps or seconds
- Quality gate: one form rule that makes the number honest
Example. If a rep only counts when shoulders stay away from ears, then a shruggy rep is not a rep.
A practical effort target at home is to stop most sets when you could maybe do 1 or 2 clean reps more. For holds, stop with a few clean seconds left. Not a collapse test. Not a hero set.
Rest matters too. People rush at home because resting feels a bit silly, like you should answer Slack and also get strong. Longer rests often preserve rep quality. Pairing push and pull can help. One works while the other rests.
The anchor-free pull ladder
Level 1 towel isometric rows
The smell of coffee in my Lisbon kitchen, and the little noise of my Decathlon watch when it wakes up. It’s a funny contrast with what comes next. No machines. No anchor. Just me, the floor, and a towel.
Sit tall on the floor, legs straight or slightly bent.
- Loop a towel around feet or mid-shins and hold both ends
- Pull hard as if rowing, but don’t let anything move
- Quality gate: long neck, shoulders away from ears, ribs down
- Metric: hold 10 to 30 seconds, stop with a few clean seconds left
In my experience, isometrics earn their place because you can hit “hard effort” without any setup drama. The catch is also simple: you get strong in the positions you actually train, so I rotate between a couple elbow angles across the week.
Progress inside Level 1 stays simple.
- Hold longer with the same shape
- Pull harder for the same time
- Add tiny pulses without shoulders creeping up
Level 2 friction rows
Level 2 uses the floor as resistance. Friction becomes the variable. Socks on tile is one universe. Shoes on a grippy surface is another.
To reduce surprise, standardize one thing.
- Fix range and mark the start spot with tape
- Fix tempo like 2 seconds pull, 2 seconds return
- Fix body shape: same knee bend, same torso angle
Then change only one dial at a time.
A clean rung list.
- Short range slides with strict form
- Longer range slides without losing the long neck
- Slow eccentrics with a 3 to 6 seconds return
- Pauses at the top 1 to 3 seconds without shrugging
If floor conditions change often, pause-based tracking travels better than pure reps.
Level 3 prone W T Y pulls
Some evenings the apartment is quiet and I can hear my t-shirt fabric against the floor. This is the “nothing to attach, nothing to slide” pull work. It looks too simple. The ego will be bored. Good.
Lie on your stomach. Forehead on a folded towel so the neck stays long.
- Lift into a W, T, or Y shape and pause
- Cues: collarbones wide, shoulders away from ears, reach long
- Don’t fake range by cranking the low back and flaring ribs
Progress with control.
- Longer pauses
- Slower reps, especially down
- More density: same total reps in less time, still clean
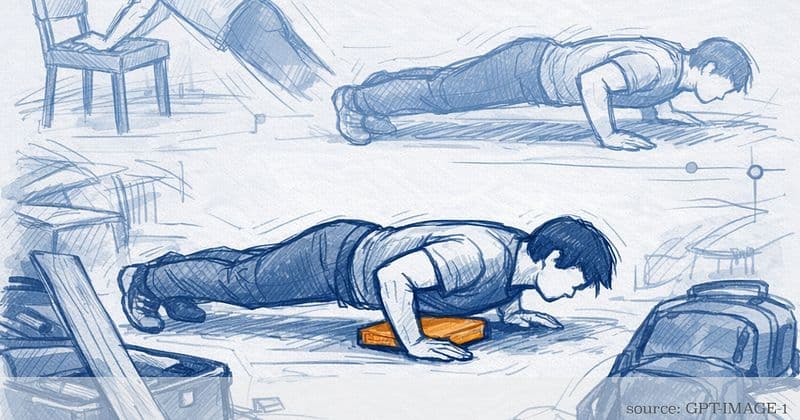
Level 4 chest-supported backpack rows
When you’re ready for load, chest support keeps the limiter in the right place.
- Make low chest support with a pillow or folded duvet on the floor
- Use a backpack with books as the load
- Row elbows toward back pockets, not up to ears
- Pause briefly at the top, lower slow
- Quality gate: no torso heave, no neck jutting
Pack smart so load doesn’t shift. Heavy items close to the back panel, centered, empty space compressed.
The quiet hinge ladder
Backpack RDLs
The first thing I notice is the smell of canvas and paper when I grab a backpack and shove books inside. Not glamorous. But it’s quiet, and it works.
- Hold the backpack close to thighs
- Send hips back like closing a car door with your butt
- Knees bend a little, but don’t turn it into a squat
- Quality gate: long spine stays the same top to bottom
If load is limited, use tempo and pauses.
- Lower in 3 to 6 seconds
- Pause near the bottom 1 to 2 seconds without losing position
- Add range only if it stays clean
A quick side video can help when tired. It’s just a simple check.
Hamstring sliders and hinge holds
The floor tells the truth. On some tiles the towel whispers and slides, on others it grabs like it’s angry. Treat sliders as variable resistance.
Hamstring slider curls.
- Lie on back, heels on a towel
- Bridge hips up, slide heels out and in with control
- Ribs down, don’t flare low back to “save” the hamstrings
- Stop when hips drop or movement gets snappy
Progress.
- Two legs first
- Then two legs out, one leg back for eccentric focus
- Then true single-leg if it stays smooth
If today is a no-load day, hinge holds keep the pattern alive. Time and tempo are portable.
- Tempo 2 seconds out, 2 seconds in
- Track duration 20 to 40 seconds
- Keep strict shape the whole time
A small-space week that does not break
The little click of my Decathlon watch, coffee still in the air, and I look at the room like an engineer. Not “what program do I want”, but “what will still happen when the day is ugly”.
A simple base that protects pull and hinge is a 2-day template.
- Session A pull ladder + hinge ladder + short trunk finisher
- Session B push pattern + squat pattern + short trunk finisher
A tiny mobility add-on that fits the same no-friction idea (and doubles as a form check).
- 2-minute reset (before Session A or B):
- 30–45s shoulder circles + reach long (keep shoulders away from ears)
- 30–45s hip hinge drill with hands on hips (feel “hips back” without ribs flaring)
- 30–45s slow cat-cow or thoracic rotations (just enough to move, not a ceremony)
A safety net prevents drift.
Coverage rule. If a pattern has not shown up in about 7 to 10 days, it becomes priority next session. Often it’s pull or hinge.
A one-line check like “pull done y or n” can be enough. No spreadsheet empire. This is what it looks like when I catch myself drifting:
Pull | — | last: 9 days ago | skipped (setup friction) | low energy
Honest progression in real rooms
The smell of dish soap on my hands, the little bip of my watch when I stop a timer. It feels like debugging right after I close the laptop: same habit, different system. Did I change two things at once? Did I even write down what I did?
If weight is capped, a quiet overload order that tends to work.
- Holds and pauses
- Slower eccentrics
- More range
- Harder leverage
- Small load proxy with a backpack
The rule that prevents my log from turning into a mess: change one dial only at a time.
A travel-proof one-line log.
Pattern | variation | best set | effort (1–2 RIR) | constraint tag
Example.
Pull | L2 friction row long range | 3×10 | ~1–2 RIR | slippery tile
For me the Polar H10 chest band and a basic Decathlon watch are receipts, not referees.
Failure modes that ruin consistency
One night I tried to force a slippery setup anyway, tired and impatient. My feet slid faster than I expected, my neck jumped in to “help,” and I felt that sharp, hot tightness under the skull the next morning at my desk. Nothing dramatic, but it turned typing into a constant small annoyance. And it made me quietly avoid pulling for a few days, which is exactly how the drift wins.
Slip and neck takeover
That little scritch scritch sound of towel on tile is not hardcore. It’s just unpredictable friction.
If it slips.
- Use shoes with rubber outsole, towel trapped under the sole
- Add a non-slip layer under towel
- Shorten range and slow tempo
- Switch to Level 1 isometrics and count seconds
If the neck is doing the work, it’s usually cues and tempo, not more effort.
- Long neck, shoulders away from ears
- Elbows toward back pockets
- Slow down, add a small top pause
If you can’t feel pulling at all, go down a rung. Skill and positioning are often the missing equipment.
When rows turn into a low back test
You feel it when the set becomes a different exam. Upper back is fresh, trunk is shouting.
Signs.
- Torso keeps rising as you row
- Rounding increases rep after rep
- You jerk or use hip drive
- Set ends from low-back fatigue
Fix it by changing the wrapper. Use chest-supported backpack rows. Keep a 1 to 3 seconds top hold as the overload tool. Quiet, measurable, repeatable. Continuity stays the win.
Some evenings it’s still that same smell of coffee left too long, and the little beep of the watch that asks if I will keep it simple, or invent excuses. Push-ups and squats will always feel easy to start. But if pulling and hinging vanish, the body slowly becomes more desk-shaped, even if training feels “done”.
So I keep the ladders close: anchor-free pulling I can measure, from towel isometrics to chest-supported backpack rows, and quiet hinging that fits an apartment, from backpack RDLs to sliders and hinge holds. One metric, one form gate, and one dial at a time—so even on low-energy Lisbon evenings, the missing patterns still show up.